To shop for parts: Click the tab marked SHOP near the top of any page to visit SV3Power.com/store/.
Please excuse the small, grainy photos. The larger originals were lost long ago.
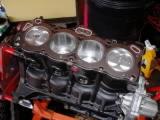
When the bare block came back from the machinist after boring and honing, I gave it a thorough bath in hot soapy water before assembling anything. My garage can get cluttered, but the parts are always clean when they go together.
March 2004: Assembled the short block and performed a few minor tests to see what had changed with the new combination.
The cylinder head (4A-GE bigport) got rebuilt and lightly ported. The machinist unshrouded the valves, did a five-angle valve job, and milled the head about 0.030″. Most of the port work is in the bowls. Combustion chamber volume is now 34.5cc. I believe 37cc is pretty typical for a stock chamber.
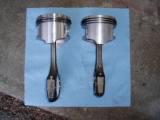
Rods are stock 7A-FE, pistons are stock ’88-’89 4A-GE. We used 7A-FE wristpins pressed into the rods. This required honing out the pin boss in the pistons just enough to let the pin slip in by hand. Each piston and rod was match balanced. By juggling the rods, pistons, and pins, we got the weight of each end, and of each piston+rod unit, within one gram of each other. This required shaving one gram off of one rod end cap and two grams off of another, which was easy. Next time I’ll spend the money for a real balance job that includes the crank, flywheel, etc. The photo shows the final 7AGE setup next to a stock 4AGE piston and rod from the early bigport engine.
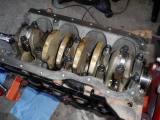
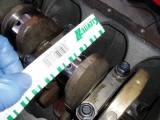
Crank and then rods went in the block and got torqued. Bearing clearance came up dead even on every journal with mains at .0015″ and rods at .0018″. The #1 and #4 rod caps are where the metal was removed to balance the engine. You can read about how the balance job was performed returning to the Articles page. New OEM rod bolts were used; the bolts are not the same as 4A-GE bolts, and I couldn’t find anything better than stock. They’ve held up to many years of abuse with no sign of failure. And yet the rumor that 7A rods are too dainty simply refuses to die…
Engine was mocked up with a spare head gasket, using Play-Doh to check piston-to-valve clearance. Cams are Web-Cam #577. Although the Web cams make this an interference engine, the lumps of Play-Doh on the piston weren’t even touched when the engine was rotated through with a timing belt. This is still a non-interference engine when stock cams are used, despite the fact that the head has been milled, and the block decked, about 0.030″ each. A genuine Toyota 4A-GE head gasket was installed. They are not expensive, and are far more reliable than most aftermarket gaskets.
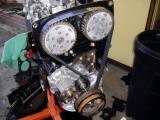
A Porsche 944 timing belt (Goodyear number 40107) is the standard choice for a 7A-GE. It is 117 teeth compared to the 4A-GE’s 113 teeth, making it too long to accommodate the 4A-GE oil pump and tensioner. The 7A-FE oil pump and timing belt tensioner push the belt farther and must be used with the Porsche belt. I would rather have used a 115 or 116 tooth belt but was unable to find one with the right pitch and configuration to allow the use of the 4A-GE oil pump and tensioner. A Club4AG member found a 115 tooth Renault belt that apparently fits with the 4A-GE oil pump and tensioner: http://forums.club4ag.com/zerothread?id=76287
7A-GE camshaft timing is inherently “off”, but that subject is really too involved to discuss here. To learn why it’s off, and what to do about it, visit Unraveling the Mystery of 7A-GE Cam Timing.
I elected not to use the timing belt covers because I like to tinker and they tend to get in the way. I also like the way the engine looks with the cam pulleys and timing belt exposed. I’ve run the car this way for many years now with no ill effects at all.
